Need help?
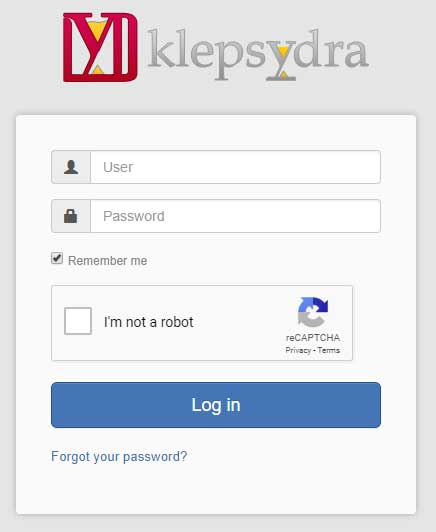 Tout d'abord, lorsque l'utilisateur accédera au lien de l'application, il devra se connecter à l'aide du nom d'utilisateur et du mot de passe créés précédemment dans la page de présentation de l'application.
Si l'utilisateur dispose de la combinaison nom d'utilisateur / mot de passe correcte, il sera connecté et redirigé vers le tableau de bord de l'application.
Si l'utilisateur oublie le mot de passe, il peut cliquer sur le lien «Mot de passe oublié» et, en suivant la procédure, récupérer le mot de passe perdu.
Pour récupérer le mot de passe, l'utilisateur doit avoir une adresse électronique valide et un numéro de téléphone valide associé au compte Kelpsydra.
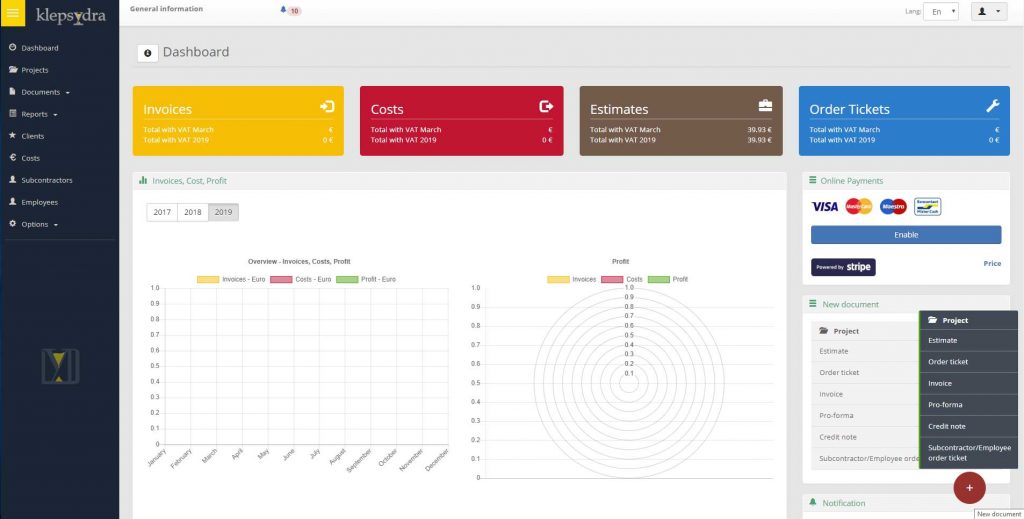
The Dashboard is the main screen of the application where the user can see an overview of the company status depending upon the privileges the administrator gave him.
First of all, in the application there are three main menus that will be present all over the application that will be explained in detail later. There is the left menu, used for general navigation, right menu accessed from the “plus” sign, used to create a new document, and the top menu, a contextual menu that changes according to the section needs.
On the dashboard the user sees at a glimpse the status of the company, or his own finance status if he’s a freelancer or self-employed. The first part show in color coded rectangles the status of the invoices, costs, estimates and order tickets for the current year.
In the next panel there are graphical representations of the earnings, profit, possible contracts and actual contracts of the company on a yearly basis. The buttons in the top left corner of the panel change the year and data of the graphics with the according ones from the selected year.
Dashboard
In the left panel there are shortcuts for creating new documents, and a notifications panel that shows alerts, and automated activities that have taken place.
On the bottom of the page, if the user has opted for the time tracking option, there is a map where all the active users of the time tracking application can be visualized according to their position.
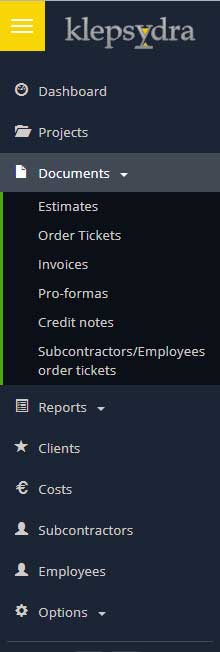
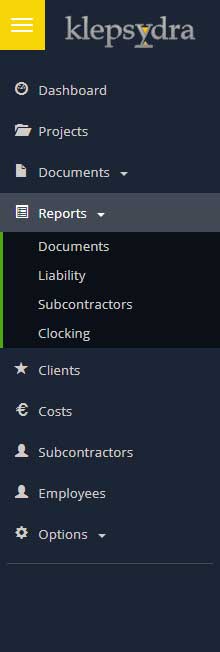
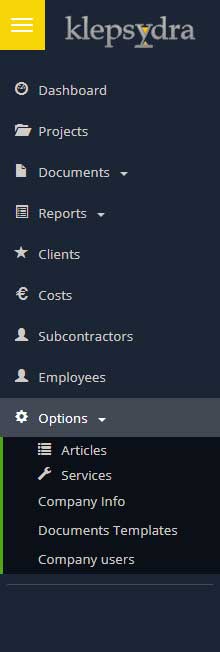
The main navigation of the application is done using the left side menu. This menu offers the possibility to access all the information that the user has stored in the application. It’s quite self- explanatory. If the user what’s to view he’s clients, or maybe add or modify a client he clicks on the “Clients” link. The same goes for all the other links. There are three submenus, one for documents, which holds all the document types that can be created, one for reports, and one for general options that you set once and access across the whole application.
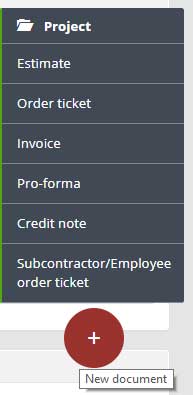 The menu for creating new documents is usually hidden. Once the user hovers over the plus sign the menu becomes visible. From this menu new documents and folders can be created. Once the user clicks on a link, he’s taken to a page where the new document can be created.
The top menu of the application holds the little information that is available across the application. This information is the title of the section currently active, the notifications, the language selection menu, and the log out, and user options. This menu changes according to the active section and accommodates menus that are needed in that section.
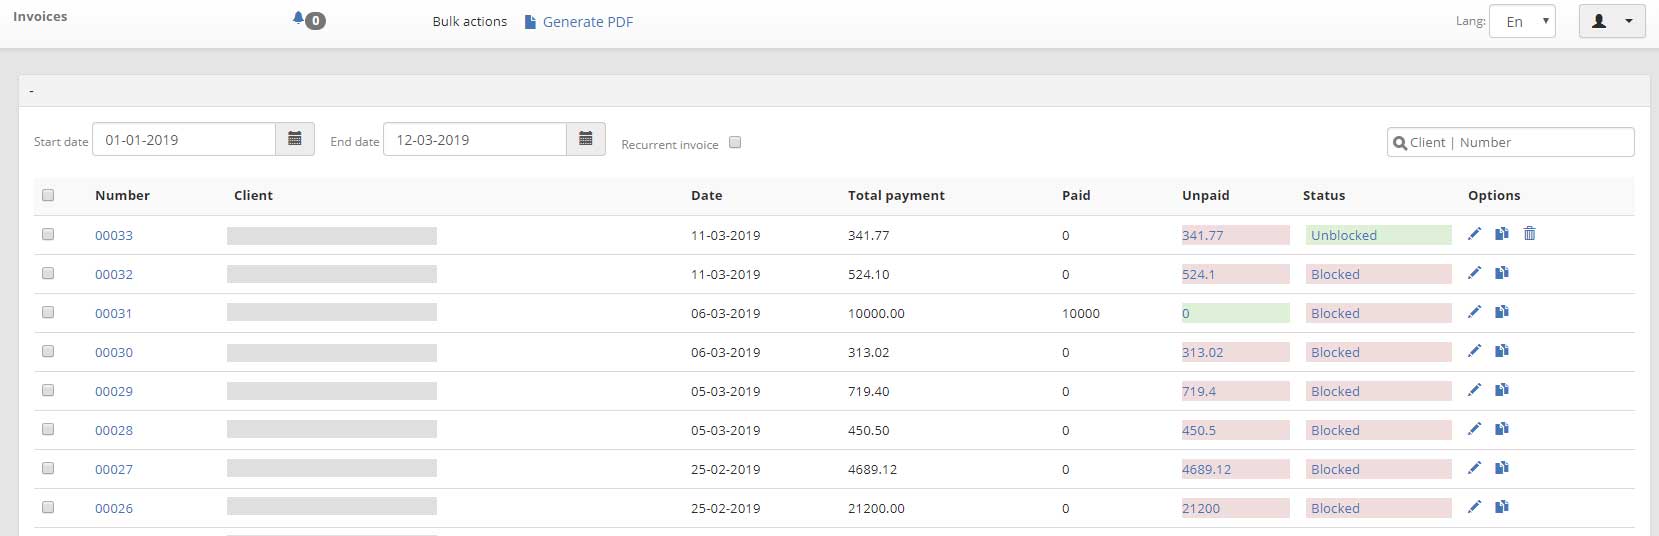
Regardless of the document type, if the user clicks on the document name in the left side menu, a list with all the documents in a specified period appears. We will use invoices as an example.
The list of documents contains basic data about each document, like the number of the document, client, date at which it was created and so on. The top menu, if it’s necessary it can contain specific menus and buttons. On the invoices page it contains a button to generate a pdf file from all the selected invoices. Some basic actions can be performed on documents directly from the list, like blocking or unblocking a document, or for the invoices, adding a partial or complete payment of that invoice.
At the end of each line in the documents list there is an options menu with at least three options. One is marked by a pencil icon, and used for editing details of that document, one marked by the two identical files icon is a copy icon used to create a duplicate of that document, and the last one marked by the trash can icon is used to delete a document.
On top of the document list, there are a few filters to view just the needed documents. Start date and end date filters, filter documents after their date or their creation date. By default the ones from the current year are shown in reverse chronological order. The search field in the right can be used to filter documents by client name or by their number. For example, if a use knows he want to see the invoice with the number 0456, he just types the number to view this only invoice.
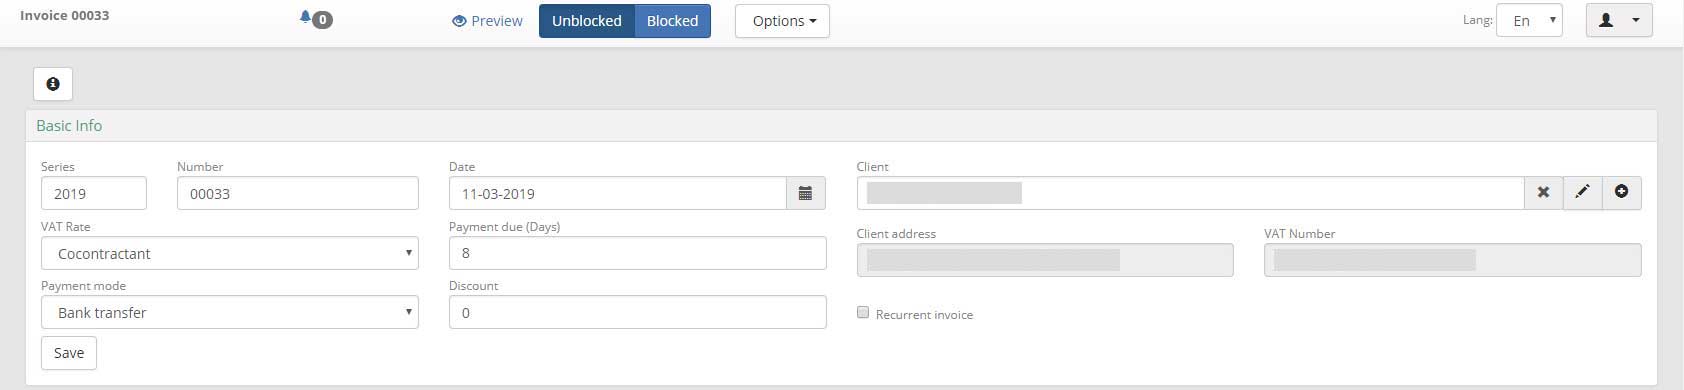
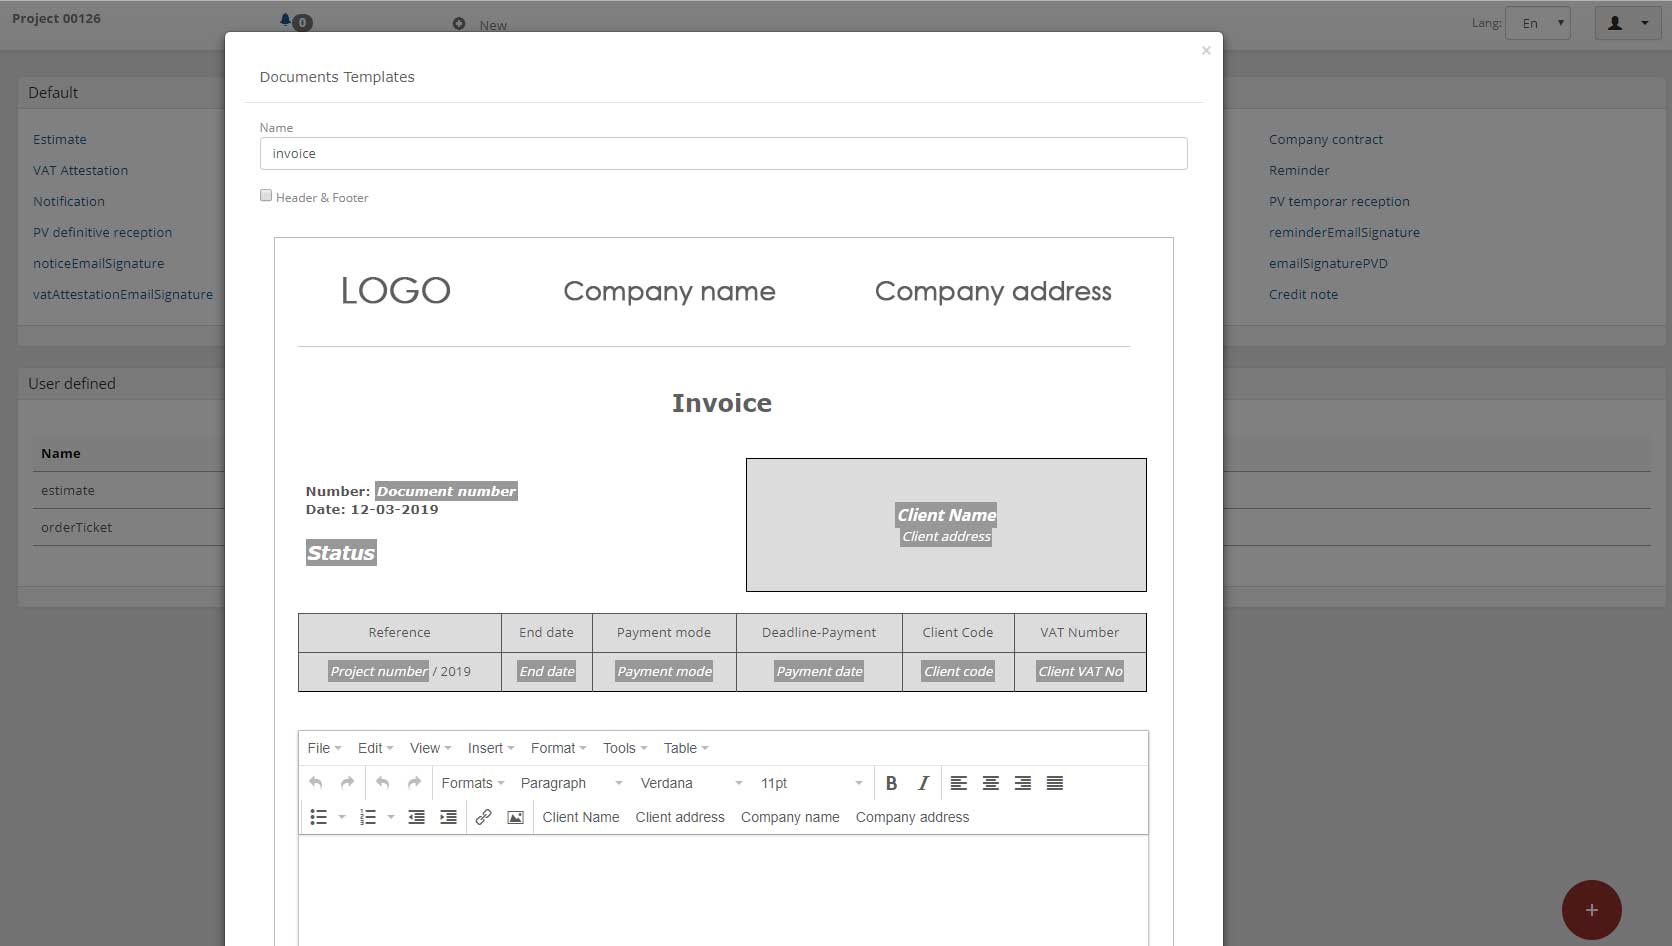
For creating documents regardless of the document type, the pattern is the same. Once the user clicks on a link on the left menu, he is taken to the page where a new document created. This page consist of two panels containing different modules. The first panel is a form that contains basic information about the document. Again using as an example invoices, the basic information form contains the number of the invoice that is auto generated, and the date of the invoice that defaults to the current date, client and other needed information.
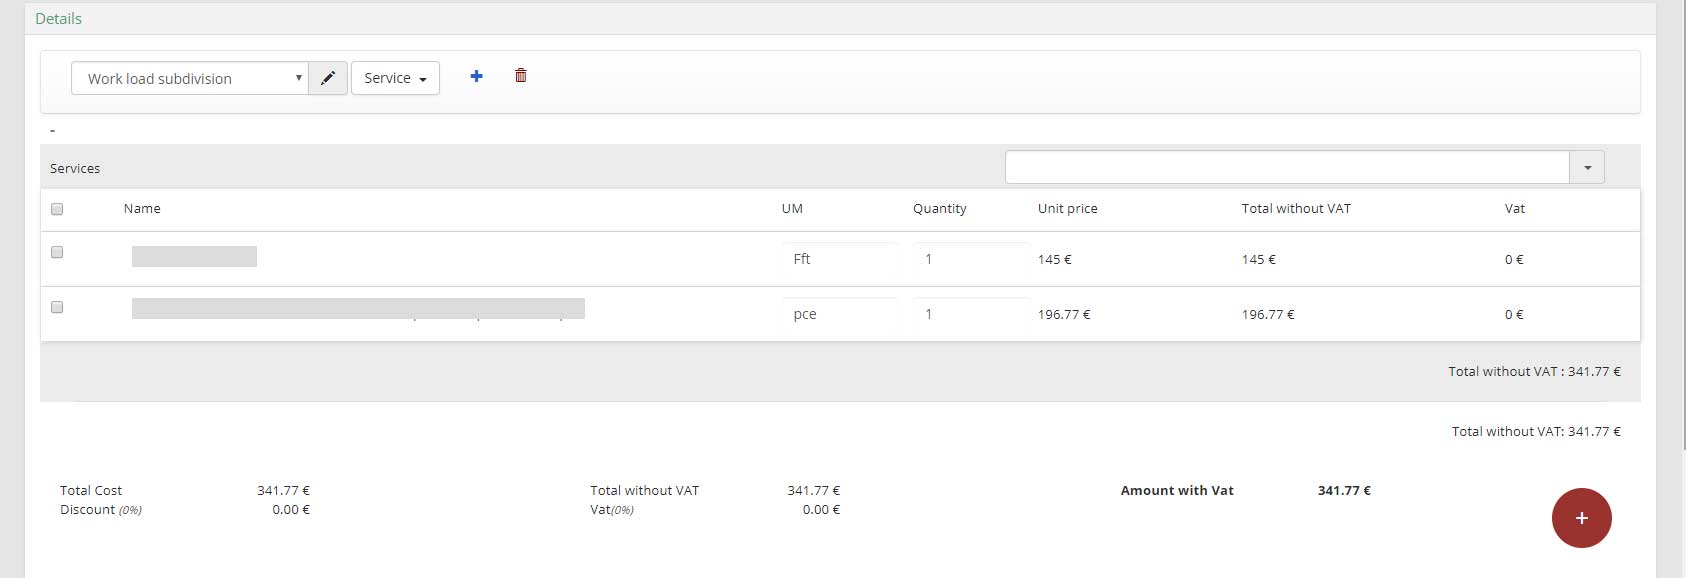
The second panel contains modules for editing detailed information about each document. All of them contain the module that enables users to add services in sections and subsections and to alter them for the new document or save it as a template for future use. On the bottom side of the page details for the total prices are displayed.
After selecting the workload subdivision and the category, the user clicks on the plus sign to add a new service or product to the document. This adds a new empty service or product. After the user fills in a name, measuring unit, price this is automatically saved in the document. At the end of the line there is a menu with some icon-buttons. The first one is a plus sign button. This adds a new line after the last one in the document, in the same category as the service from which the button was pressed. The second one is a floppy disk icon to save the service as a template for later use. The third one, the trash can is used to delete services, and the forth, is the options button. By pressing the last button the service view expands and details about the service are available to the user. Details about the price of a service can be set here, and also if it’s a complex service, articles can be added to the service, and the price of the service will be calculated from those articles and the price of the labor.
After a new empty service is added, if the user wants to use a previously saved service, he can just start typing the name in the appropriate field, and the module will search his services for the ones that have similar names. Then the user can choose from a list the desired service, and all the fields in the service are filled with the information from the selected service. The same applies to all the documents.
The top menu for each document contains specific buttons, to modify the document, or to generate new ones using the existing services from the current document.
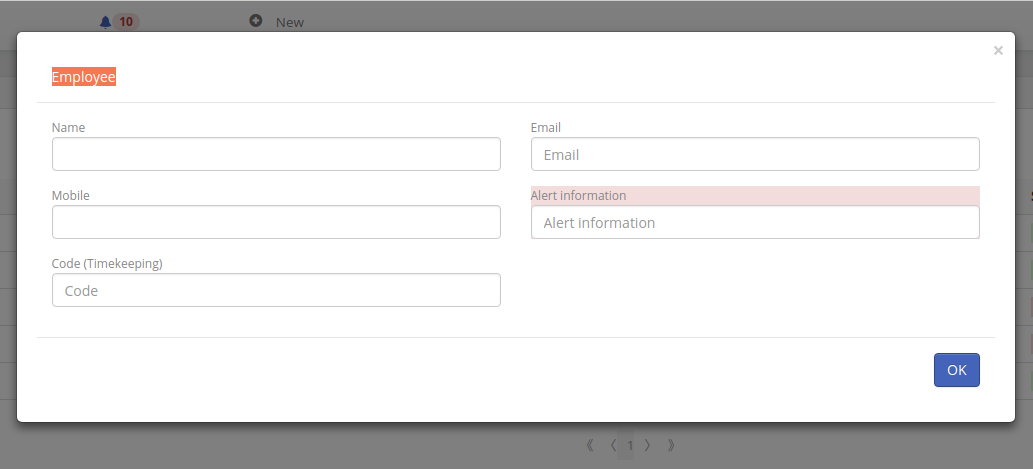
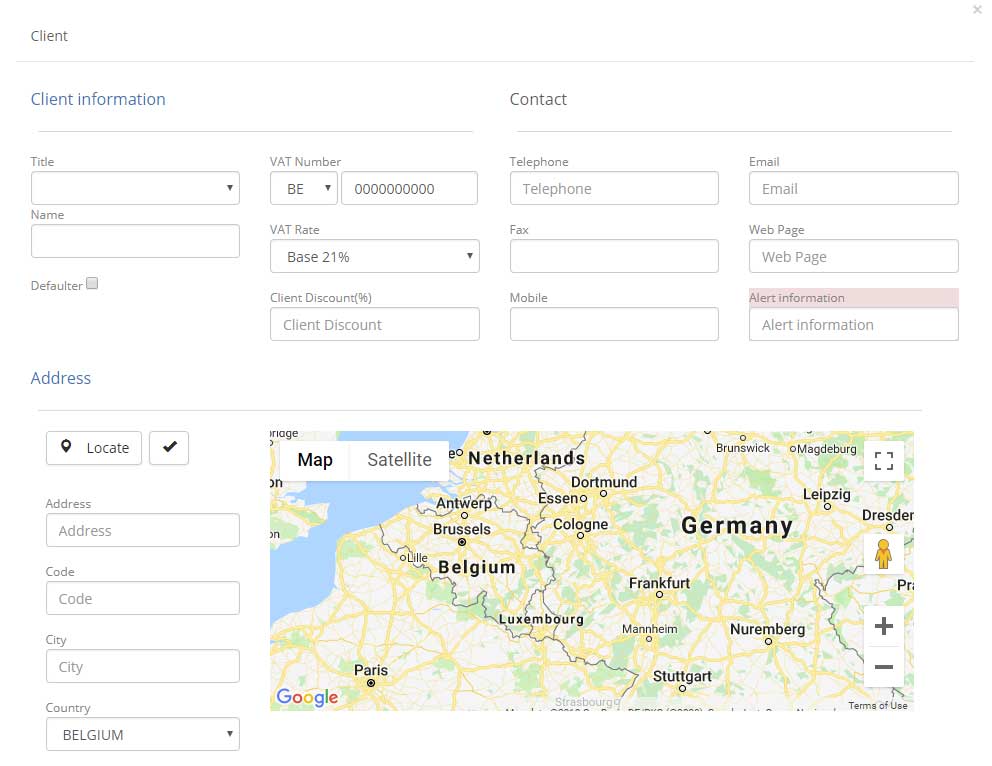
First of all, as with the documents, if the user clicks on the name of different entities in the left menu, a list with the latest added entities is displayed. To be easy to use, all the lists look and behave similar. For creating and editing different types of entities, because they are not often used, they were not added in the right side menu. For these, the top menu has a button to add a new entity. When this button is clicked, a new window is displayed, containing a form with all the needed fields for a specific type of entity. For example for adding a new client the form looks link in the following image. It contains basic information to identify the client, and a location to know where future work may be located at. It also contains a form to add a contact person, and details about that person, but that is not displayed here.
Projects are more complex than documents or entities. They are basically a container for a bigger project, containing all the documents, costs and information to see the evolution of the project, and if the company is making or losing money.
As a document, a project also has some basic information, so a client can be set, an address where the project takes place, and other information.
The basic need for a project is to have all the documents available in one place, and to have an overview of the project at a glimpse, offering a basic report of the earnings from invoices, costs and what was done and still needs to be done.
For example the project holds the invoices the proformas, credit notes, costs, and subcontractor order tickets, to know what the company earns and what needs to be paid or was already paid.
Also there is a file manager to have the documents in pdf format if they are automatically generated, and to be able to upload necessary files to a project. For example on a construction site pictures from before and after a job was done can be uploaded to show the client the progress.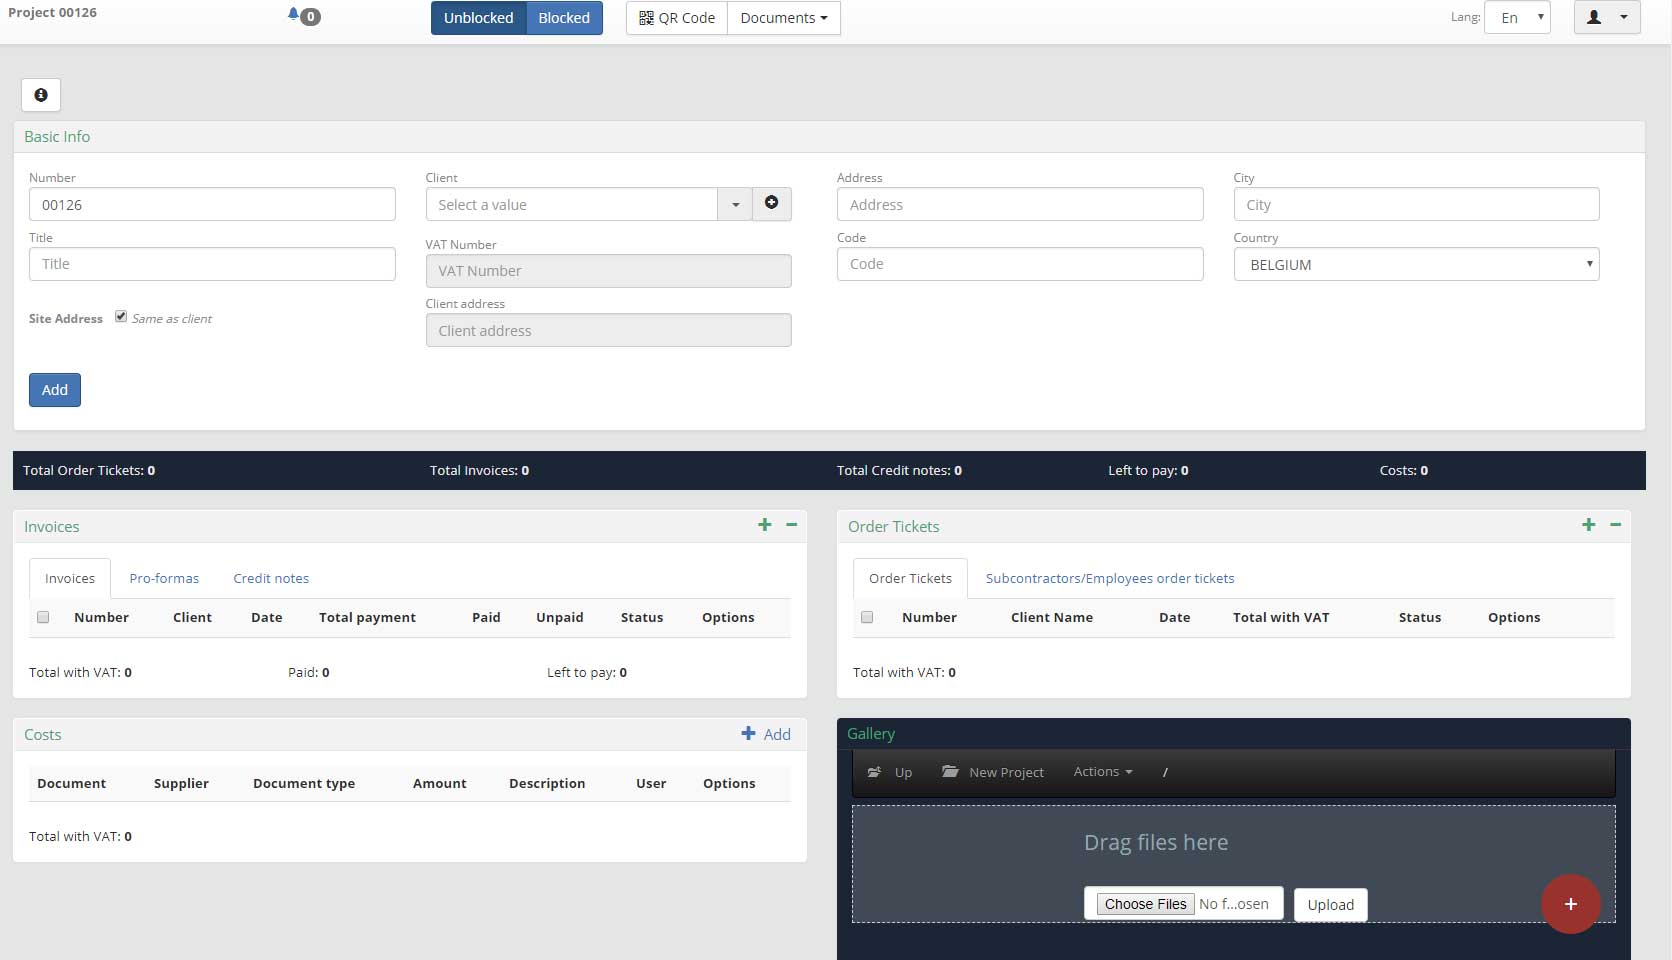
Because the application generates a lot of documents, and each document must have company information on it, by accessing the company info link in the left menu, users can change details of the company. Company information is used from the account creation process, and can be edited at any time, to have complete and working document templates.
Filling in all the information and uploading a company logo and signature assures that the documents are complete.
Each Document that can be created in the application has associated a template that provides a custom look for each one. The templates use the information filled in the company details to customize the logo and other identification information, like the VAT number, bank account, bank name, and others. This makes the documents easy to identify by the users clients.
To make the customization even more personal, Klepsydra offers the possibility to edit some of the texts and how they look in each document. This gives the user the power to make this document templates truly his own.
The user can also create custom documents that are not pre-delivered with Klepsydra. These documents can be accessed from created projects, and one major advantage is that they can be prefilled with client or company data using template tags.
One major advantage for bigger companies to use an application like Klepsydra, is that the administrator can delegate different roles in the application to multiple users. This way there can be multiple users for a single company, and each one can see just what he needs, without being able to modify documents that their role does not have access to. There is a role for invoicing, so creating this type of user account can give the user access just to invoices, to create and modify them. There is a role for managing costs, so someone in the company that buys the necessary materials for a project can add them in the application to have an overview of the possible profit. On other important role is the one for the accountant. The company accountant can have a special user to connect and download all the information needed by him. This makes his job a lot faster, and saves the time and the money needed to go to the accountant and give him all the necessary papers. The application offers many roles, but most of them are self-explanatory just by reading their name. Another interesting feature is the fact that the roles can be layered on top of each other. This gives the administrator the possibility to add or remove roles from users to give them more or less responsibility in the company.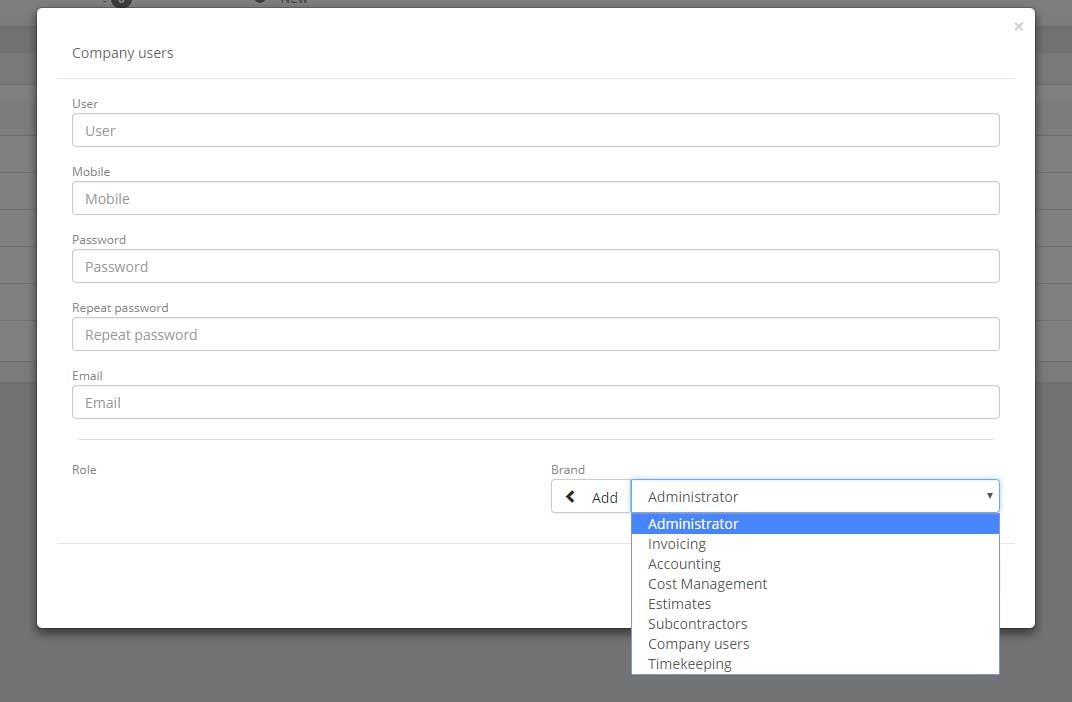
The mobile time tracking applications work only if the smartphone is registered in the platform. This can be easily achieved.
- Start the mobile application. If the phone is not registered an error screen will be displayed.
- Click "Register" and a code will be given to you. This code needs to be filled in the platform next to the subcontractor/employee the phone belongs to
- Fill in the code in the platform and save your progress.
- On the phone click the "Test" button to see if your registration was successful.
- Start over if there was a problem.